
There are two methods to debug ABAP inbound proxies in SAP.
- Debugging using SPROXY test feature
- External Debugging
Each method has it’s own advantages, disadvantages, limitations and use cases. But, using these two methods you can fully debug and test an inbound ABAP proxies.
In this article we will discuss in detail how to perform each debugging and testing method and their use cases and advantages.
Use Cases – Troubleshoot using SPROXY
The internal SPROXY debugging method is useful if you need to debug variations of the same XML input message. This is a great way to test and debug SAP application processing without having to connect with the external system or PI/PO. Moreover, using this method ABAP developers can work independently to complete Developer Unit Testing (DUT) scenarios without integrating the interface end-to-end.
Use Cases – Troubleshoot using External Debugging
We can use the external debugging method if you need to debug the proxy logic when messages are triggered by the external system or PI/PO. This will allow us to troubleshoot connectivity related issues, issues due to proxy version inconsistencies, character set issues, etc. Or if proxy messages are sent with attachments you can use external debugging methods to identify attachment related issues.
To use either method, you first need to identify the ABAP implementing proxy class. Additionally, you need proper authorization, proxy connectivity between ECC and SAP PI/PO completed and proxy class generated/activated.
Besides, you can check my previous article on how to implement an Inbound Proxy interface to update exchange rates in SAP.
How to Find the ABAP Proxy Implementing Class:
Before you can debug the ABAP inbound proxy, first you must find the ABAP proxy class. Then, you need to set a break-point in the appropriate method or ABAP code line in the ABAP implementing class. Break-point could be either a session break-point or an external break-point depending on the debugging method you choose.
You can find the ABAP Proxy class in two easy steps,
- Step 1 – Find the Inbound Service Interface and Namespace
- Step 2 – Determine the ABAP Proxy class using SPROXY transaction
Step 1 – Find the Inbound Service Interface and Namespace
The first step of finding the ABAP Proxy class is to determine the inbound service interface name in PI/PO. If you are an ABAP consultant, you will need help from PI/PO team to complete this task.
You have two options to find the Service Interface,
- Option 1 – Find the Inbound Service Interface via the Integrated Configuration Object (ICO):
- Option 2 – Find Interface using iFlow in NWDS:
Option 1 – Find the Inbound Service Interface via ICO:
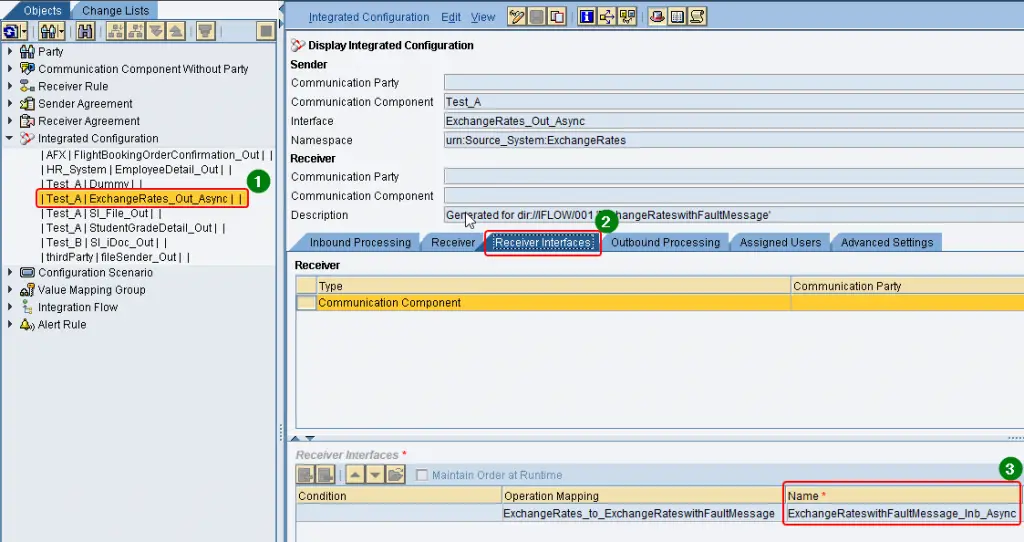
To find the Inbound Service Interface from ICO, open the Integration Directory (ID) and navigate to ICO.
Then, go to the “Receiver Interface” tab of ICO to find the Inbound Service Interface name. In this tab, you can also find the Namespace and the Software Component Version (SWCV) of the Inbound Interface. This information is required for you to find the ABAP Proxy class in the SAP back-end system in SPROXY transaction.
Option 2 – Find Interface using iFlow in NWDS:
If you have implemented the interface using iFlow, we can also find the Interface detail directly via the iFlow.
Open NWDS and navigate to your iFlow under the Integration Flow navigation menu.
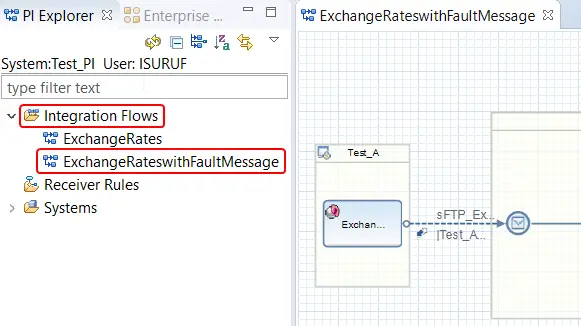
Then, click on the receiver interface name to reveal the detail of the Inbound Service Interface. Here you can find the Name, Namespace, and SWCV of the Inbound Interface.

Step 2 – Determine the ABAP Proxy Class Using SPROXY Transaction
Now that you have identified the Inbound Service Interface details such as name, SWCV, and Namespace, go to transaction SPROXY in SAP back-end system and navigate to the interface using the navigation tree.
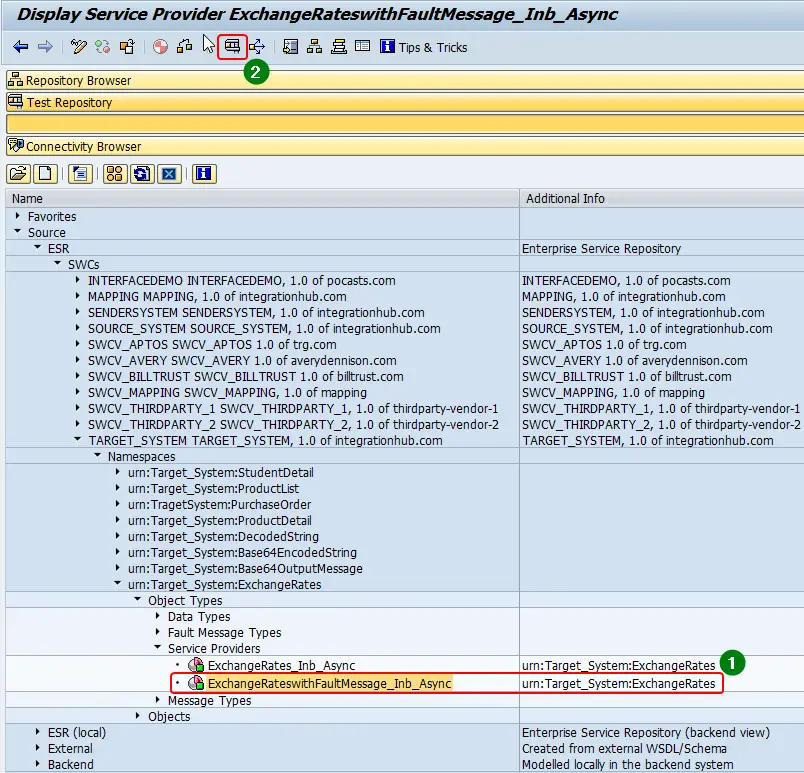
In the navigation tree select of SPROXY, select Source > ESR > SWCVs > SWCV > Namespaces > Namespace > Object Types > Service Providers > Service Interface Name.
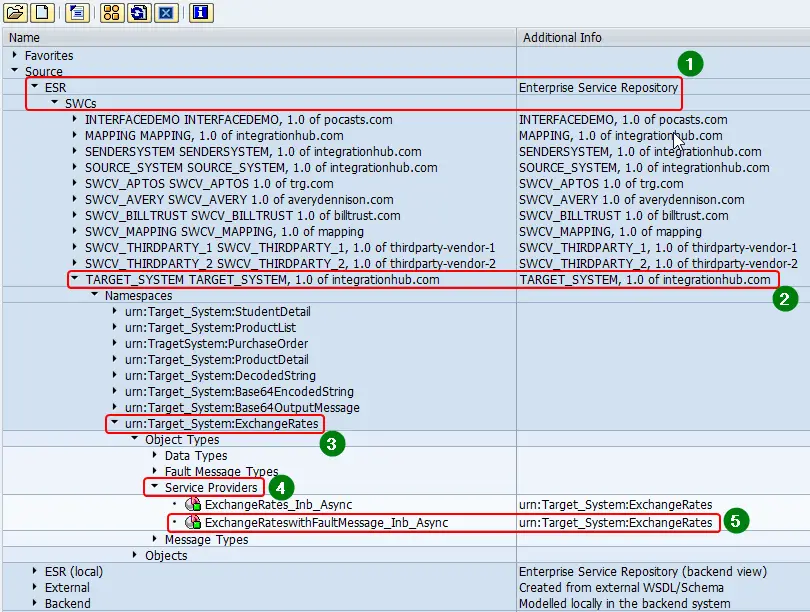
Double click of the Service Interface Name under the Service Provider view, to find the SAP ABAP OO Implementing class of the interface in “Implementing Class” field.

Debugging ABAP Proxy Using SPROXY
As the first method, let’s look at how to debug ABAP proxies using transaction SPROXY.
Step 1 – Go to Service Interface in SPROXY
As we discussed in the previous chapter, go the inbound Service Interface in the transaction SPROXY. You can use the navigation tree menu of SPROXY transaction to find your Service Interface and Proxy Class.
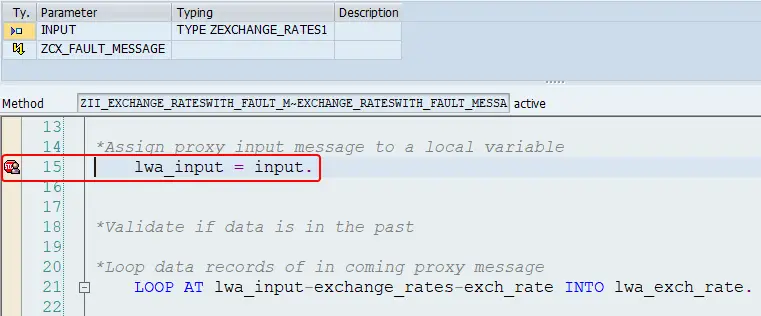
Step 2 – Set a Session Debugging Break-Point in ABAP Proxy Method.
Go to ABAP proxy method by double-clicking on the “Implementing class”.

Then navigate to the instance method of the Proxy class.
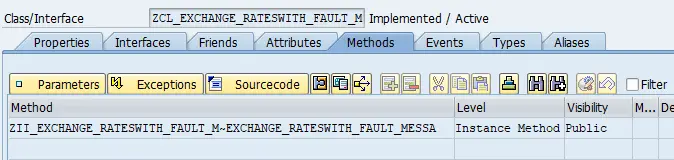
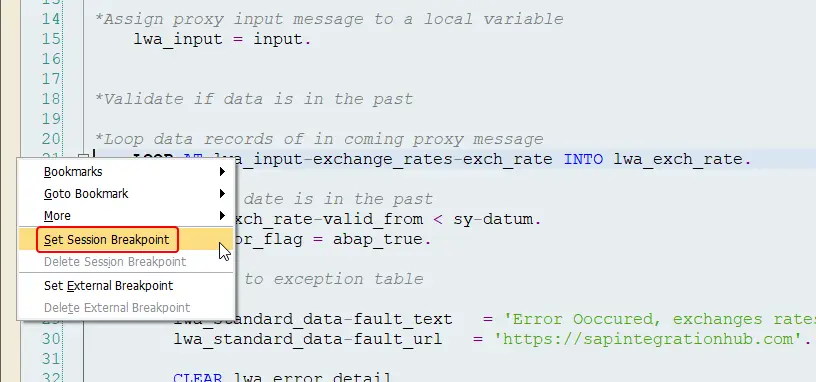
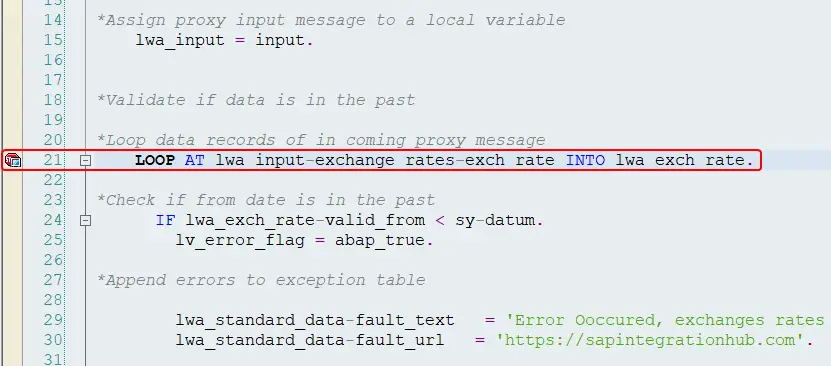
Set a session break-point in an appropriate line of the ABAP proxy code. You can do this by right-clicking on the left side of the code editor window.
Step 3 – Select “Test Service Provider”
Go back to the main screen of SPROXY transaction after setting the break-point.
To simulate the inbound proxy click on the “Execute” button on the main menu. This will trigger the “Test Service Provider” function of SPROXY.
Step 4 – Define XML Input Options and Debugging Options
When you click Execute, the system will display a pop-up window “Test Service Provider”. In this window, you can set the way you want to define the input XML message and debugging options.
Option “Generate Request Template” for input is a very useful option. This option automatically generates an input XML message based on the XSD or the input structure defined. For example, if you have an XML segment of type date in the input XML message, a default date will be set in the automatically generated sample XML message. Other XML segments of type string will set as String 1, String 2, etc.
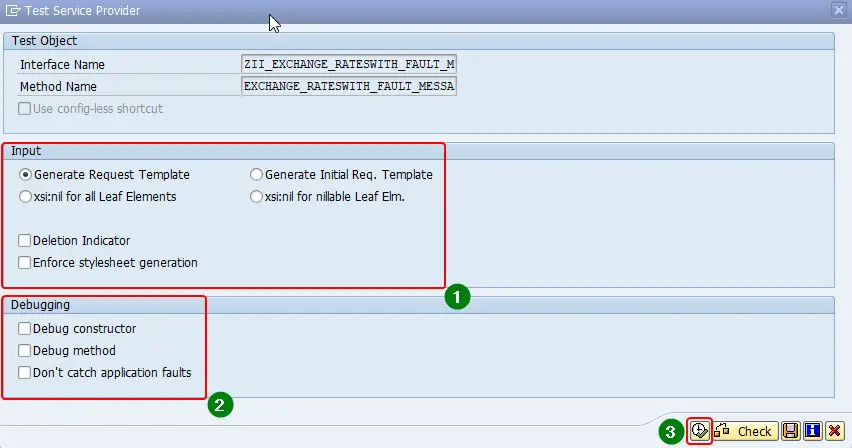
You can leave the debugging options blank as you have already set a session break-point manually in the ABAP code. But, using options “Debug Contractor” and “Debug Method” options, you can add additional break-points to the proxy runtime.
Step 5 – Define and Edit Input XML message
In the next screen, you can define the input XML message you would like to simulate. If you selected the option “Generate Request Template” in the previous step, you can simply change the values of the XML nodes as required.
To change the XML message generated by the system, click on “XML Editor” option in the header menu.
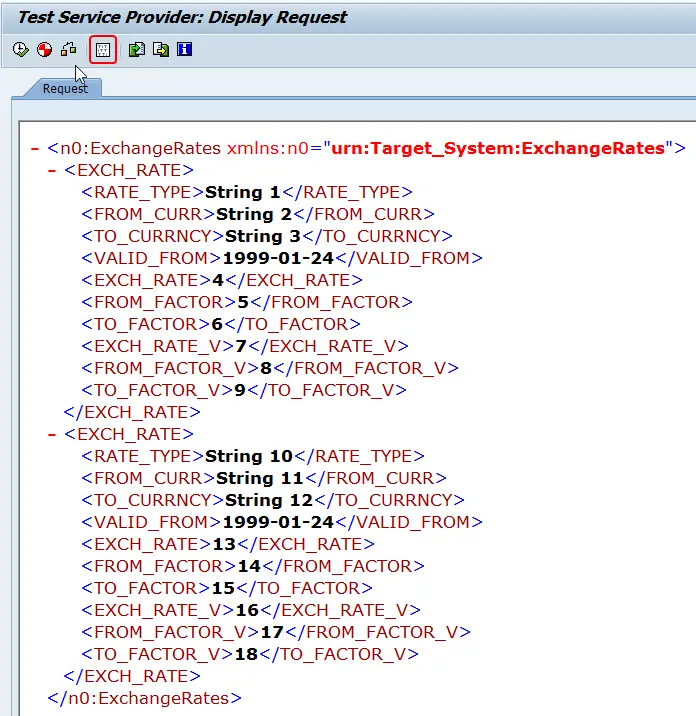
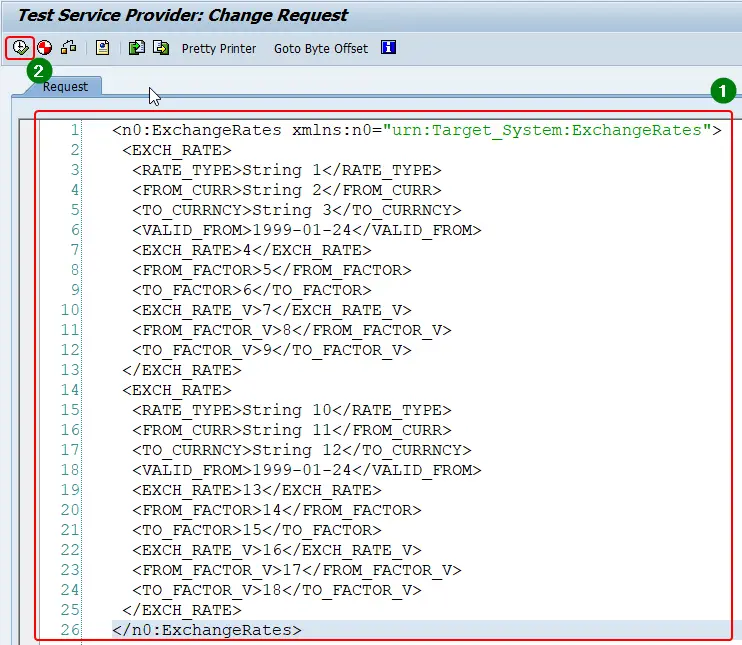
Manually edit values of the XML nodes to prepare the input XML message. Moreover, you can copy and paste complete XMLs or upload XML messages from local files to the XML editor to define the XML input message.
Step 6 – Debug ABAP Code
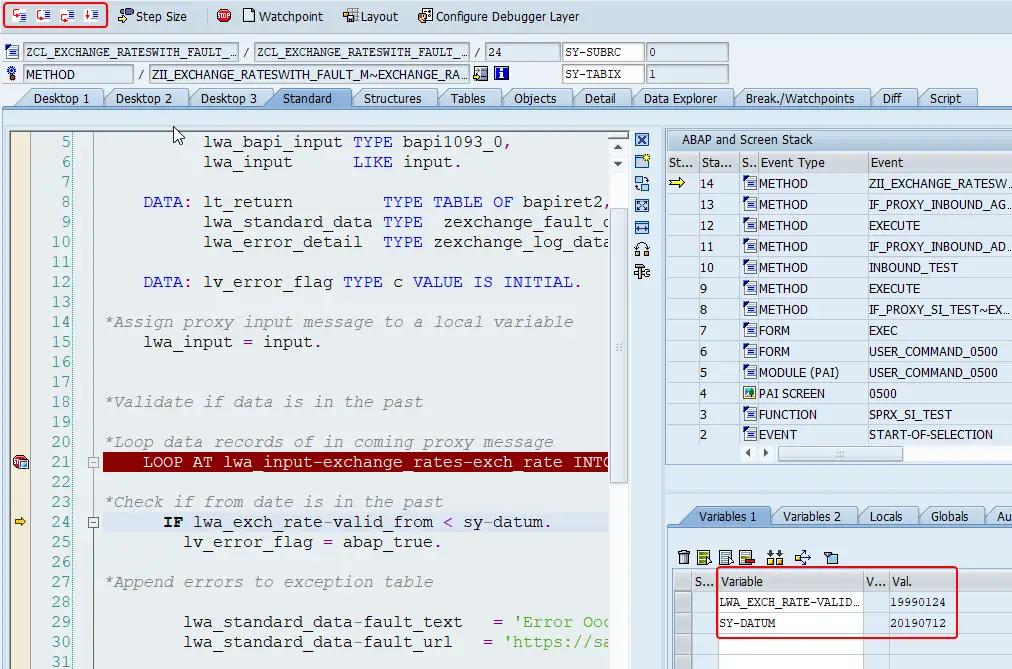
Using standard ABAP debugger options, you can debug the proxy class method implemented.
Go debug the ABAP code line by line, using function keys F5 (single step) or F6 (execute).
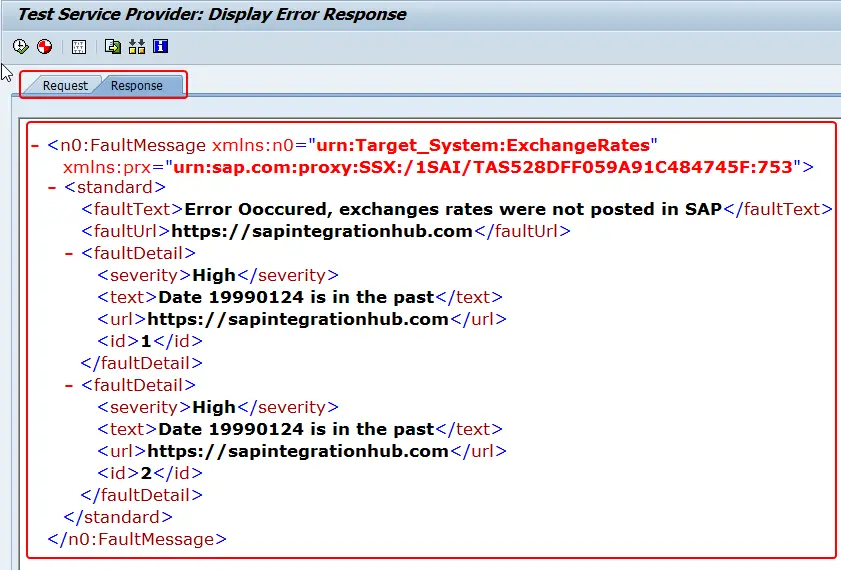
When you complete the execution of the inbound proxy, XML response will be shown with the input message on the next screen. In this example, I have implemented Fault Messages so that application processing errors are returned back to the proxy runtime.
External Debugging method for Inbound ABAP Proxy
As the name suggests, using this method we can debug the inbound message processing when the message is received from the external system. In the previous method, debugging using SPROXY, we manually prepared the XML input message and triggered the proxy runtime directly in SAP. But using an external debugging method, we can debug messages triggered from PI/PO or external systems.
But, before you can execute external debugging there are few pre-requisites that need to be full filled.
- Proxy connectivity between PI/PO and ECC should be configured and working.
- Proxy Object Generated and Interface (iFlow) Deployed
Prerequisite 1 – Proxy Connectivity Setup:
We need to have Proxy connectivity between SAP PI/PO system and SAP back-end system set up in order to develop working Proxy interfaces. There are multiple steps you need to complete to set up Proxy connectivity. You will need to coordinate with SAP BASIS team also to successfully complete the setup.
Prerequisite 2 – Proxy Object Generated and Interface Deployed:
This needs no explanation. You need to have a fully implemented Inbound Proxy Interface before you can start debugging or testing! From the implementation of PI/PO interface to the development of ABAP Proxy logic should be completed to complete the Proxy interface development.
I have previously written a step by step guide on Inbound and Outbound Proxy development. They include detail steps that need to be completed in both SAP PI/PO as well as SAP ABAP. The demo Inbound Proxy interface updates exchange rates in SAP via a file (xml) to Proxy interface.
Additionally, you can also refer how to configure acknowledgments in Inbound Proxy interfaces using Fault Messages.
External Debugging Steps
Most of the steps to debug inbound proxies using external debugging method are the same as debugging using SPROXY. For example, finding the service interface, proxy class are the same for external debugging as SPROXY debugging. But, there are two very important distinctions between the two different methods.
To set up external debugging, additionally, you need to,
- Find HTTP system user
- Configure User-Specific Debugging Setting in SAP Back-end
- Set an external debugging break-point instead of a session breakpoint
Step 1 – Find HTTP System Username
The first step is to find the HTTP system user used to connect the SAP system with SAP PI/PO. When the external system or PI/PO sends inbound Proxy messages to SAP, this user will authenticate the exchange of messages. We need this username to set the external debugging break-point in the next step.
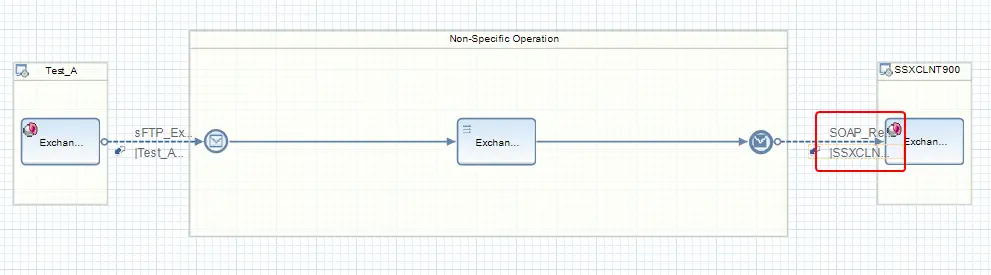
Similar to finding the service interface explained in the previous section of the article, you can find this using the iFlow or ICO. The trick is to find the Receiver SOAP Communication Channel.
Go to iFlow or ICO and find the Receiver SOAP Communication Channel.
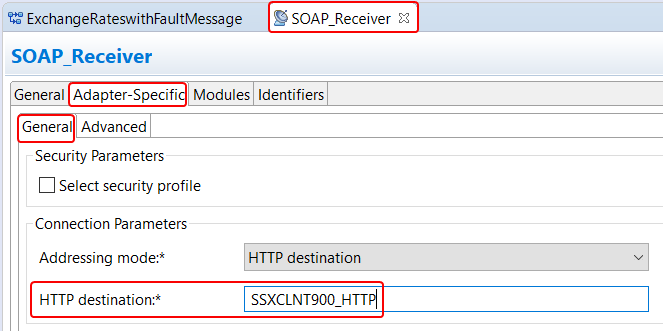
Open Adapter Specific attributes tab of the SOAP Receiver Communication Channel to find the HTTP Destination.
The next step is to find the HTTP system user used in the HTTP Destination. To find the user name, go to NWA > Configuration > Infrastructure > Destinations and select the HTTP destination from the list.
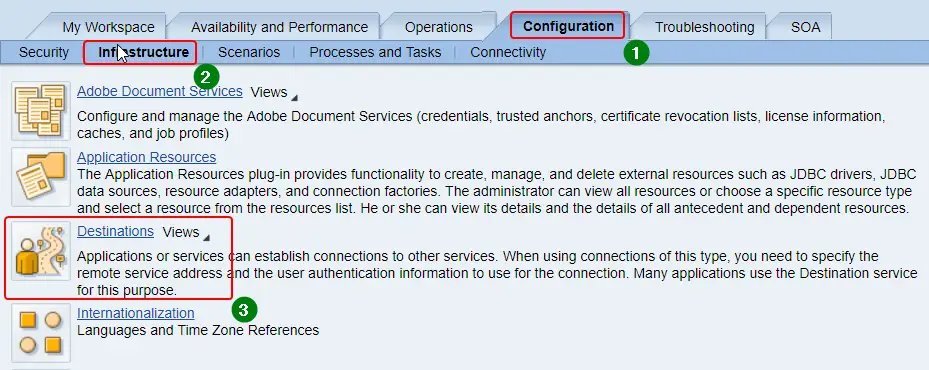
Then, go to the logon tab to find the HTTP user. In this example, the user name is “system”. This user name is available in SAP back-end system. If you go to transaction SU01, you will be able to view the detail of this user.

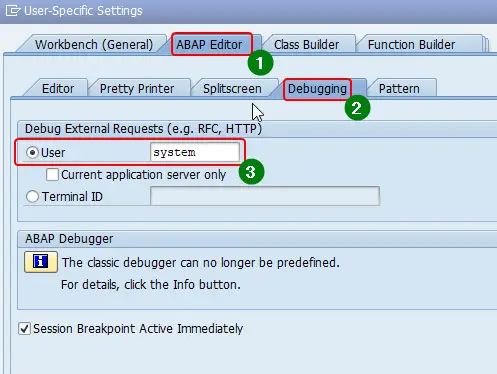
Step 2 – Configure User-Specific Debugging Setting in SAP Back-end
To configure the user-specific debugging settings open any ABAP editor and go to Utilities > Setting > ABAP Setting > Debugging.
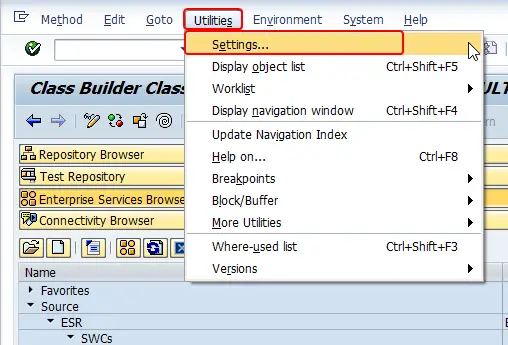
Then set the user of Debug External Requests (RFC, HTTP) with the HTTP user we determined from the HTTP destination in PI/PO.
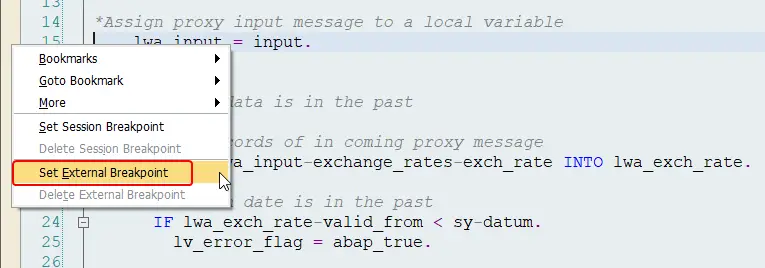
Step 3 – Set External Debugging Point
Instead of a session debugging point, set an External Break-point in the Proxy ABAP code.
Step 4 – Trigger Inbound Message from PI Test Tool
The next step is to trigger a message from the external system to SAP back-end system. Let do it via PI/PO test tool.
Using this method we decouple of dependency of having access to the message sender system or having to contact the message sender system owners. Maybe the message sender system is a third party system and you just want to test the message processing in SAP PI/PO and SAP back-end system.
This method skips the message processing pipeline step Sender Adapter message processing. This is a great way to test the PI/PO mapping, message routing, and SAP ABAP proxy application processing.
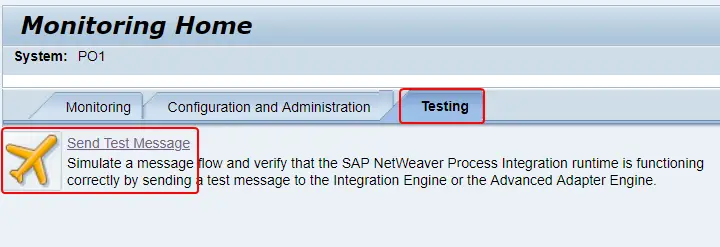
To send messages from PI Test tool, first, go to PI/PO home > Configuration and Monitoring home
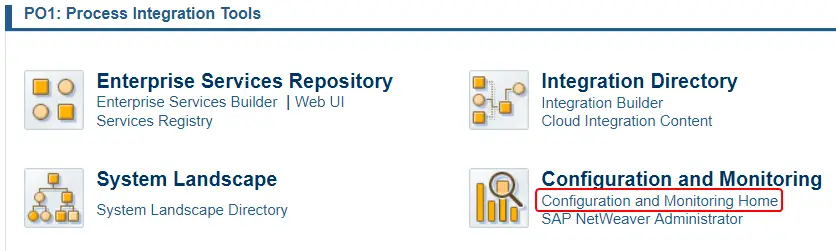
Secondly, Navigate to Testing > Send Test Message.
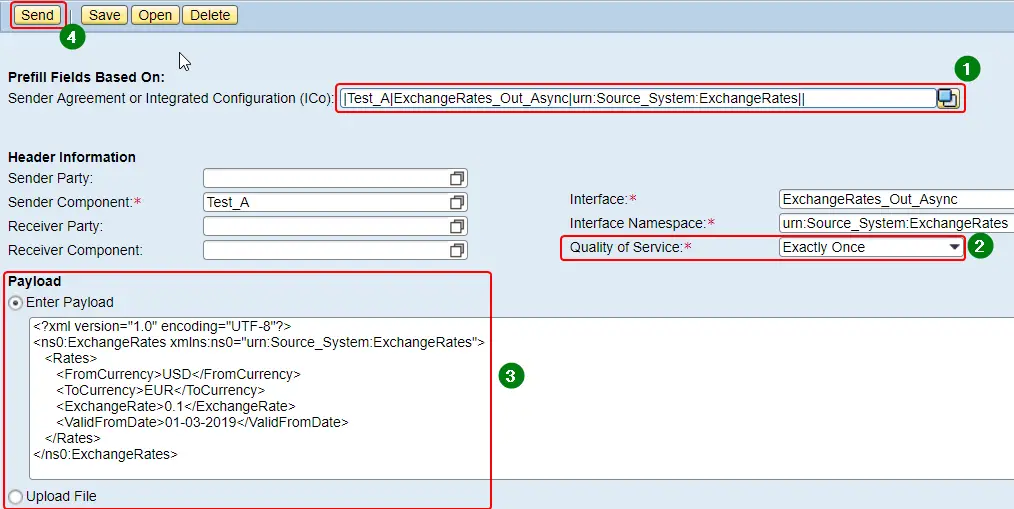
Then, select the ICO from the drop-down and select the Quality of Service (QoS).
Finally, enter the message Payload and hit Send! You can either copy paste the Payload or Upload it.
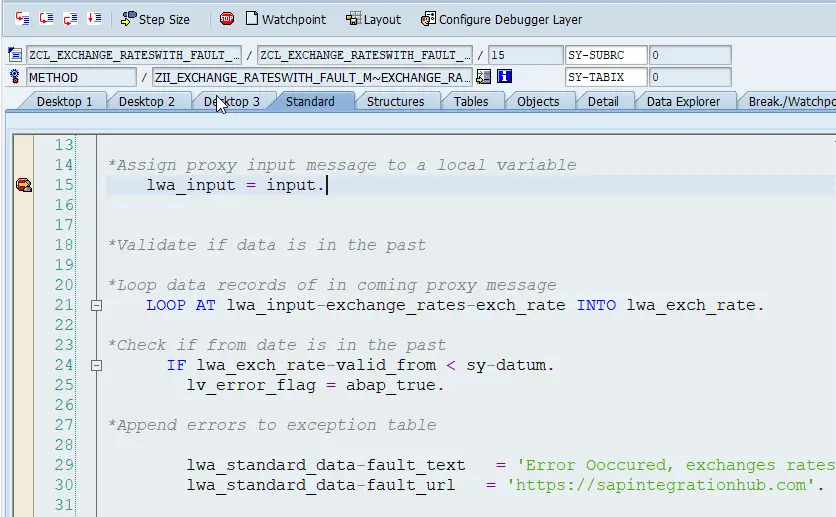
When the input message receives at the SAP back-end system, the system will automatically open a new session and processing will stop at the External debugging break-point. You can continue debugging the ABAP application login from here.
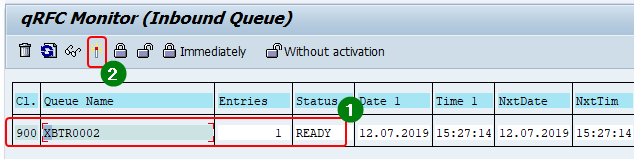
External Debugging Break-point Didn’t trigger?
Check if inbound queues are activated using transaction SMQR. If the inbound qRFC queues are not registered, you will be able to find the queues in a “Scheduled” status in SMQ2.
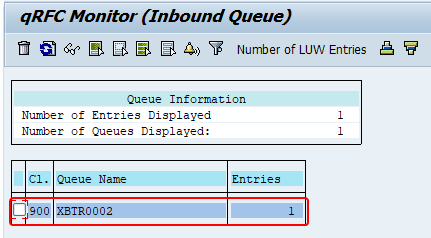
Additionally, you will be able to view these messages in a “Scheduled” status in SXMB_MONI.
To debug, you can activate the qRFC queue using the same transaction SMQ2.
I hope you are now able to understand the different inbound proxy testing and debugging methods. Also, steps on how to set up internal debugging using SPROXY and External HTTP debugging. If you have any questions on debugging and testing SAP ABAP Inbound Proxies, leave a comment below.

Thank you for the excellent article. I enjoyed reading your blog!!
Thank you Mahi!!
Is parasoft 2 use
Hi. Thanks for the detailed explanation. I am trying to test the Outbound service interface with attachment in SPROXY to test the connection. Is it possible to do that? I need to attach a file in sproxy for testing.
Hello Abisha,
I am not sure SPROXY supports that. Check if you can use base64 encoding instead of the pure file attachment.